Measure Twice, Cut Once
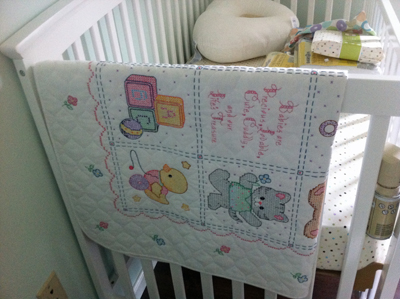
With only six weeks to go until the arrival of our daughter, the nursery is shaping up nicely. After the baby shower in January, it's filled with baby gear: more types of blankets than I know what to do with; adorable hats with ears; changing tables and hampers, video baby monitors, and lots of tiny outfits. I'm especially happy with all of the hand made items in the room: there's the needlepoint blanket my mother made for us, the needlepoint prayer Kiersten's mother made for her nursery when she was a baby, some heirlooms from Kiersten's family, original artwork bought from one our of DC115 CPSA member's show (Nan Bozenka's beautiful cone flowers), and of course the room itself, which Kiersten and I laid the floor for with our own two hands.


In keeping with the handmade theme, it was only natural to browse Etsy for some of the other decorations, and we settled on three prints by GalerieAnais. The prints came as 8" x 10" prints, unframed, so I thought this would be another chance to put a personal touch in by framing and matting them in my studio. When we painted the nursery, we didn't yet know the gender of the baby, so we chose a blue/green wall color. Since learning we would be having a girl, I've been trying to sneak some pink into the decorations. Because of this, I thought the prints would look great with a white frame, warm white outer mat, and pink inner mat. Since I'm used to framing and matting my own artwork, I didn't think the double mat would give me too much trouble. After spending the better part of a Saturday afternoon destroying multiple mats, I thought I'd write a post about some tips from what I'd learned.
Cutting double mats actually isn't difficult as long as you don't cut corners (no pun intended!):
- Step 1: Cut new outer edges on your top mat to ensure they are square.
- Step 2: Actually use the stops on your mat cutter to set the bevel cut distance. This will ensure everything's parallel and at a set distance.

- Step 4: Cut the outside dimensions of the inner mat a little smaller than the top mat (about 1/2" smaller on each side). This will ensure the only edges used for measuring and squaring will be the top mat's.
- Step 5: Stick the bottom mat to the top mat using double-sided tape (with the cutout still in place) .
- Step 6: Increase your mat cutter stops by the inner border thickness, plop your taped mat in place, and cut the bevels for the inner mat. Ta-da! The taped together cutouts should fall out. Everything will be perfectly aligned, centered, and at uniform thickness.

So, you can probably guess that I did the opposite of almost every step the first two attempts, before doing it the right way. The main two places I went awry were assuming my staring materials were square, and not using my mat cutter stops (instead, I drew lines which ended up being non-parallel). When you only have a 1/4" inner border, even a small degree of non-squareness will result in a visually noticeable thin border at one end of the cut which fattens up at the other. Anyway, thought I'd share my experience - maybe it will save someone else a little frustration when cutting double mats!
Here's the final piece, framed and matted, on the wall in the nursery (the artwork in the picture is by GalerieAnais on Etsy):

